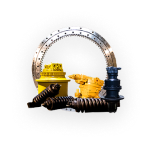
How to Reassemble a Swing Drive
Every time an excavator operator spins the house of their machine, grabs a bucket of dirt, and turns back to fill a waiting truck, there’s a swing drive swiveling along a slewing ring to make it all happen. All that work also means the gears, shafts, and bearings of a swing drive are subject to quick starts and stops, friction, and constant wear which limits the working life of every swing drive. While not every salvaged swing drive can be rebuilt and reassembled, this important part is a frequent guest in the H&R Recon and Rebuild shops.
Take a trip into one of our shops and watch as a parts technician rebuilds a Komatsu PC350LC-8 swing drive. You’ll get an up close look at some of the processes and techniques that go into rebuilding this part from reassembling the planetaries to assembling the pinion shaft and bearing to finally putting it all together.
❱❱ Reassembling a Swing Drive (Step-by-Step Guide)
- Seals are pressed into the retainer plate with a hydraulic press.
- The technician slides the retainer plate onto the pinion shaft.
- The bearing is stacked onto the pinion shaft.
- The technician uses an overhead crane and forklift to bring the swing drive to a hydraulic press to fully compress the bearing onto the shaft.
- The hydraulic press exerts a uniform pressure onto the bearing to press the bearing onto the shaft and seat it next to the retainer plate.
- The technician adds thrust washers to the gears and inserts the gears into the planetary carrier.
- Planetary pins are pushed into the gears.
- The technician builds a second planetary carrier starting with the thrust washers.
- Bearings are lubricated and then placed into the planetary carrier against the thrust washers.
- Gears are slid onto each of the bearings and then lubricated, followed by thrust washers.
- Retaining rings are clipped onto the shafts and hold the bearings, gears, and washers in place.
- The sun gear is inlaid into the center of the planetary and the planetary is now complete.
- The outer housing is lowered over the pinion shaft and the retainer plate is bolted to the housing.
- The housing is heated in a parts oven to gently expand it and then the planetary carrier is lowered into the housing.
- Once fully lowered into the housing, the planetary carrier is bolted into place.
- The second planetary is added to the swing drive.
- A seal is added to the housing.
- The second half of the housing is placed onto the swing drive and bolted into place. This completes the rebuild process of the swing drive.
- The swing drive is primed and painted.
- This Komatsu PC350LC-8 final drive is ready to ship and soon to be mounted to a customer’s excavator.
If you found this trip into the H&R Recon and Rebuild shop interesting, let us know on social media. We love hearing from our readers and our customers. If you’re in search of your own replacement swing drive, we’re always here to help. We know a parts search can take away time you’d prefer to spend repairing your machine and getting back to work, so when you call our dedicated Parts Specialists will search our inventory, as well as, quickly connect you to our national parts database to search parts around the U.S. Just give them a call.


