How to Measure Wheel Rim with Wheel Rim Diagram
Even in the best of conditions, the wheel rims on wheel loaders, off-highway trucks, and other wheeled construction equipment are often put to the test day in and day out. And when it comes time to find a replacement, used or new, many people quickly discover the search isn’t always as simple as they thought it would be. To help, we’ve put together this short, simple guide on measuring and identifying the correct rim for your machine. And there's even a button below that will send you to a simple, printable version if you want one for measuring out in the field.
Print Our Rim Measuring Guide »
Matching the Rim to Your Machine
When you first start your search you’ll quickly discover there are two ways to identify the proper rim for your machine -- through make and model or by the dimensions of the rim. If you have the machine in front of you, finding the make and model is simple enough. However, since often rims will work across machines searching this way generally excludes a wide swath of results -- you might think your replacement rim is hard to find, when really there’s a surplus of great rims just not labeled for your machine.
To expand your results you’ll just need to take some simple measurements and contact a seller with a searchable database.
How to Measure a Rim for Replacement
To get started measuring, you’ll need a measuring tape, a straight edge, and optional calipers. The dimensions you’ll need are listed below. And, if anything seems confusing, simply click to view the image or scroll on for our rim diagram and pictures.
Diameter of Center Hole [View Image]
Using a tape measure, measure the diameter of the center hole by choosing two points directly opposite of each other. (The diameter of a circle is always the maximum distance of any two points at the circle’s edge).
Number of Bolt Holes [View Image]
You can determine this bolt pattern by simply counting the number of bolt holes that exist around the center hole.
Bolt Hole Diameter [View Image]
Bolts (or studs) of an exact size will be used to mount the rim to drive components of your machine. Measuring the correct size of the bolt hole diameter can be done with a tape measure, a caliper, or simply by measuring the size of the bolt with a nut whose size is known.
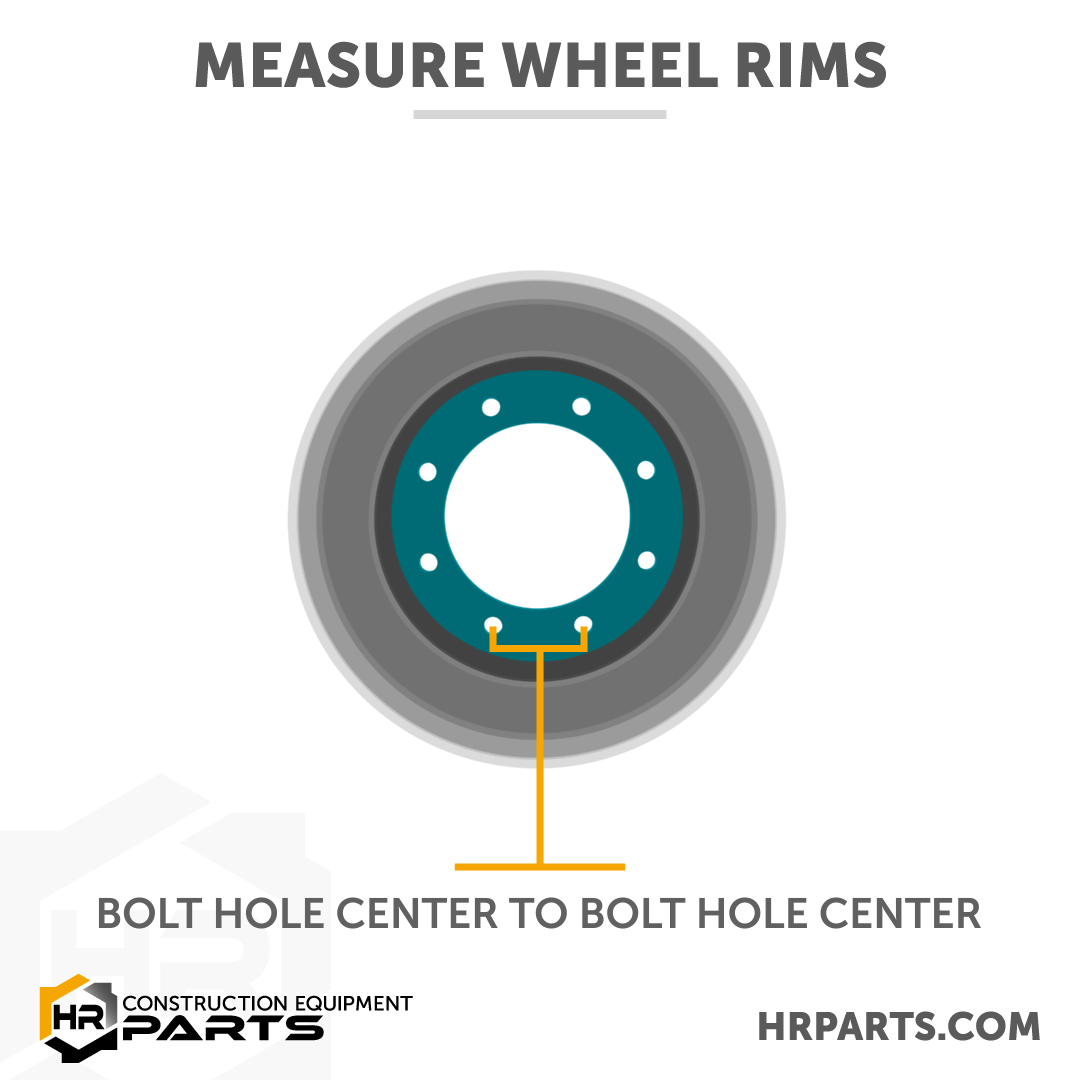
Bolt Hole Center to Next Bolt Hole Center [View Image]
Using a tape measure, measure the distance between the center of one bolt hole and the center of an adjacent bolt hole (either rotating clockwise or counterclockwise).
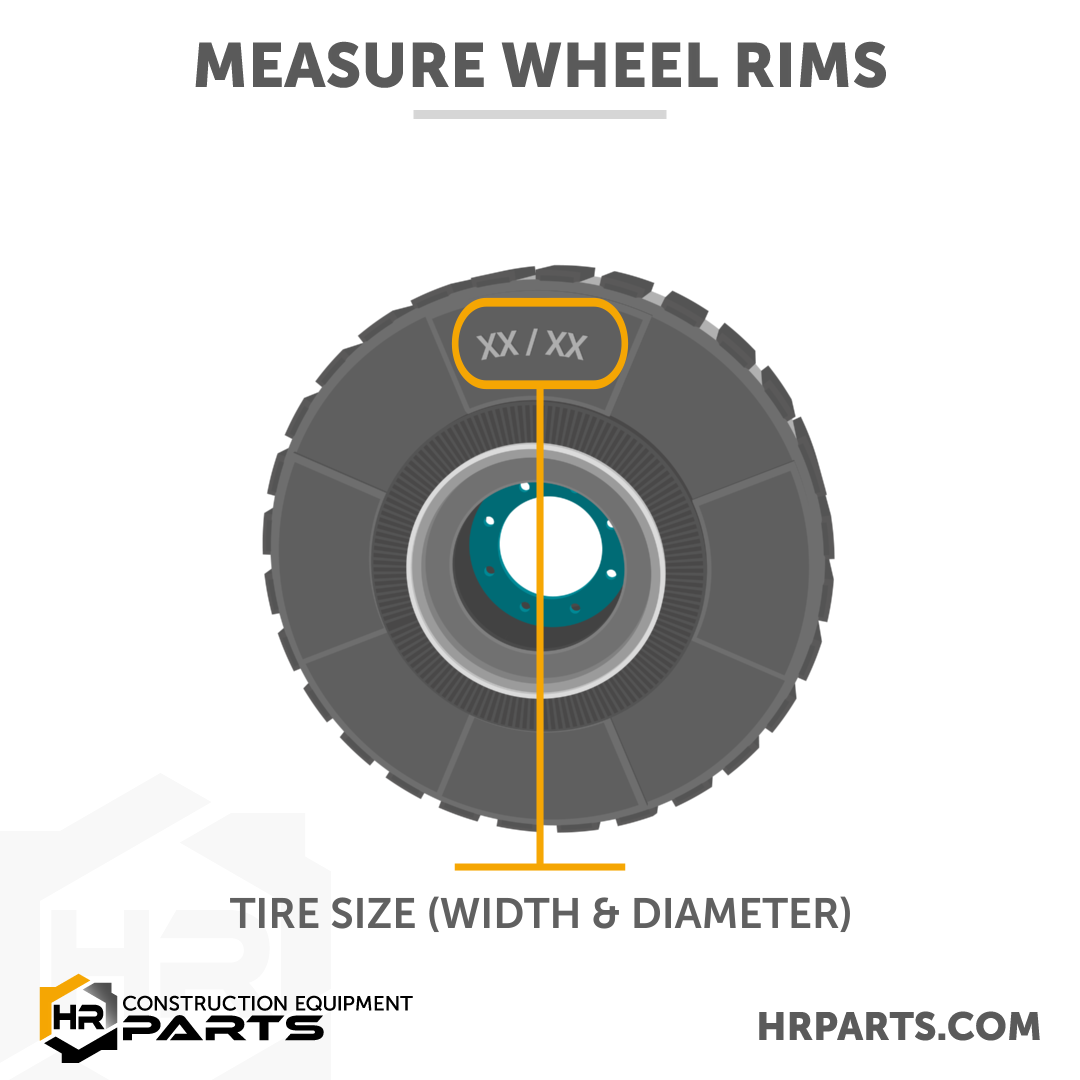
Tire Size (Rim Width and Diameter) [View Image]
The simplest and most straightforward way of determining the width and diameter of the rim you’ll need is by using the tire’s size. As a general rule, the rim will have a width 1.5 inches smaller than your tire and the rim will be labeled to match the width and diameter of the appropriate tire.
Of course, there’s always edge cases and though getting the correct width and diameter might seem simple enough, it's actually a common point of error. To properly measure the width, you’ll want to exclude both of the flanges from the measurement. Think about where a tire will actually sit on the rim and measure that inner distance. When it comes to getting the proper diameter, again think about where a tire will sit. To measure the height you’ll want to measure the diameter without the outer flanges.
If you have lingering doubts about your measurements, talk to the seller -- a good, reputable seller will have documented measurements and be able to confidently tell you the proper size rim for your tire.
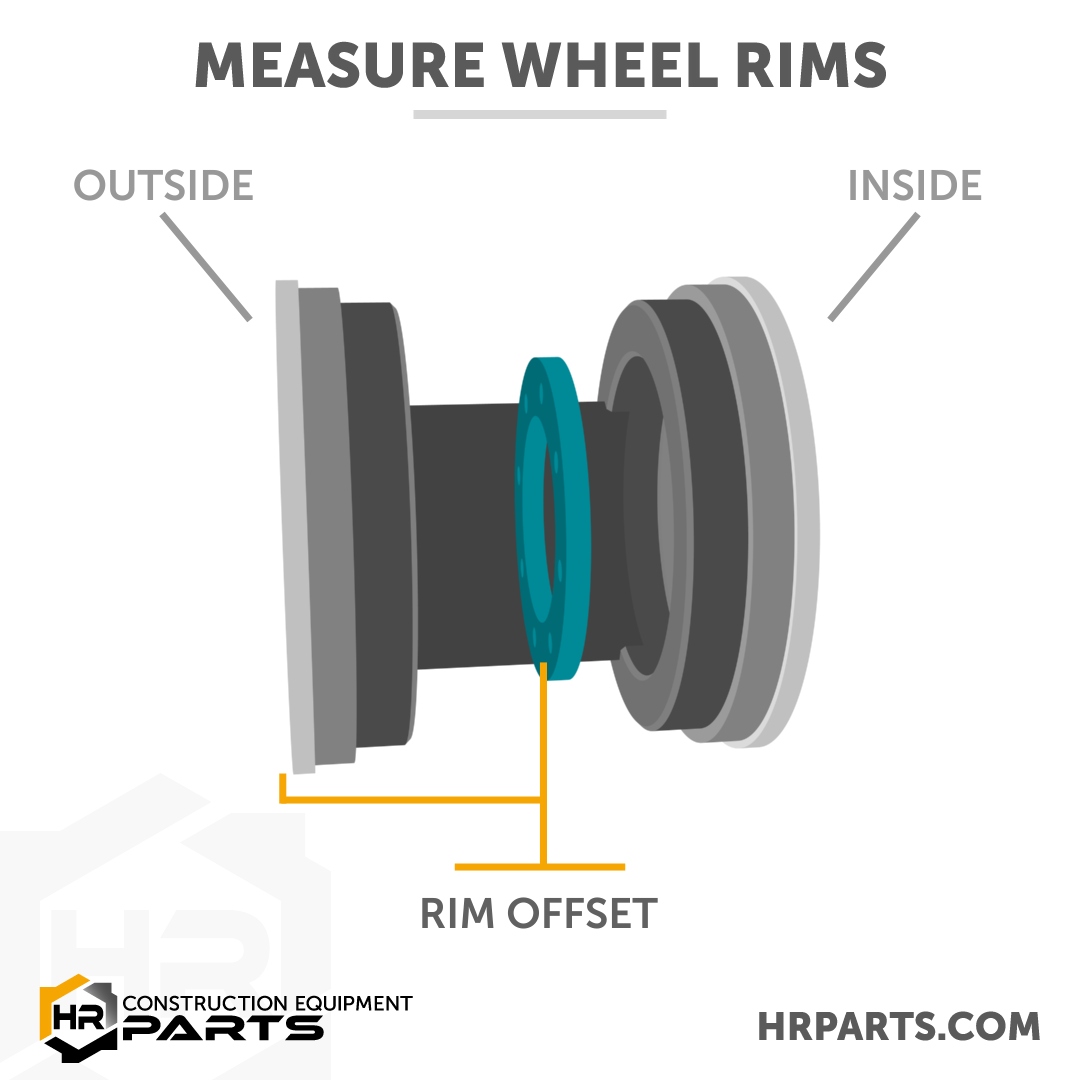
Rim Offset [View Image]
While the center hole and the circle created by the bolt holes are centered in the rim, the mounting holes are not always centered vertically in the rim when looked at from the side (scroll for diagram). This difference, either forward or backward, of the mounting holes from the wheel’s centerline determines the rim’s offset. The offset could be either a positive offset (the mounting holes are closer to the rim's outer side), no offset (the mounting holes are at the center of the rim), or a negative offset (the mounting holes are closer to the back of the rim).
Since you have already determined the rim’s width, determining the offset can be done by simply measuring the depth of the rim’s center disk from the rim’s outer edge. Lay the rim on its side, where the outside face is facing up, and measure down into the rim to the center plate.
You can use a tape and a straightedge to get this distance, but be sure to measure to the depth at which the bolt holes are, ignoring any bevels in the center disk.
And that’s it -- a few minutes and some simple measurements and you should have all the data in hand for your search. If you downloaded our simple print guide, you'll find it has a refresher on measurements, diagrams, and spots to mark your measurements.
At H&R, we support searching by both make and model and by dimensions, and if you have an issue contact our Parts Specialists who can help search our inventory and our worldwide parts network, as well.
Wheel Rim Image and Diagram Gallery
